Editor Content - Counter
The Counter element adds a timer to your popup to create urgency and encourage visitors to take action. You can customize how it looks and behaves to match your campaign goals.
To adjust its behavior, click on the Counter block, then click the Settings icon. This opens the Counter Settings panel, where you can control three main areas - Settings, Styles, and Actions.

Settings Tab
This section lets you configure how the countdown functions.
- Actions – These options define what happens when a visitor interacts with the countdown or when a specific trigger occurs. You can choose one of the following actions:
- Do Nothing – No action will be triggered when the event occurs.
- Go to URL – Redirects the visitor to a specific web page.
- Go to URL and show this step sticker – Opens the provided link and displays the popup’s sticker for this step.
- End This Campaign – Stops the current campaign once the action is triggered.
- Show This Step’s Sticker – Displays the sticker version of the current step.
- Reopen This Step from Sticker – Reopens the popup from its sticker view.
- Change Step – Moves the visitor to another step within the same campaign.

- After Expires – Decide what happens when the countdown ends. You can choose one of the following actions:
- End This Campaign – Automatically stops or closes the current campaign when the timer reaches zero.
- Minimize This Sticker – Reduces the popup to its smaller sticker version after expiration.
- Move to Another Step – Redirects the visitor to a different step in your campaign when the countdown ends.

- Countdown Type – Determines how the countdown behaves. You can choose from the following types:
- Relative (Duration) – The countdown starts as soon as the popup appears and runs for a set period (e.g., 10 minutes, 1 hour). Each visitor gets their own timer based on when they open the popup.
- Fixed Date/Time – The countdown runs until a specific date and time that you choose (e.g., December 31, 2025, 11:59 PM). All visitors see the same timer that ends at the exact same moment.
- Dynamic Input – The countdown duration is controlled by an external or dynamic source (such as data from a workflow, API, or campaign variable). This allows for personalized or automatically updated countdowns for different users or scenarios.
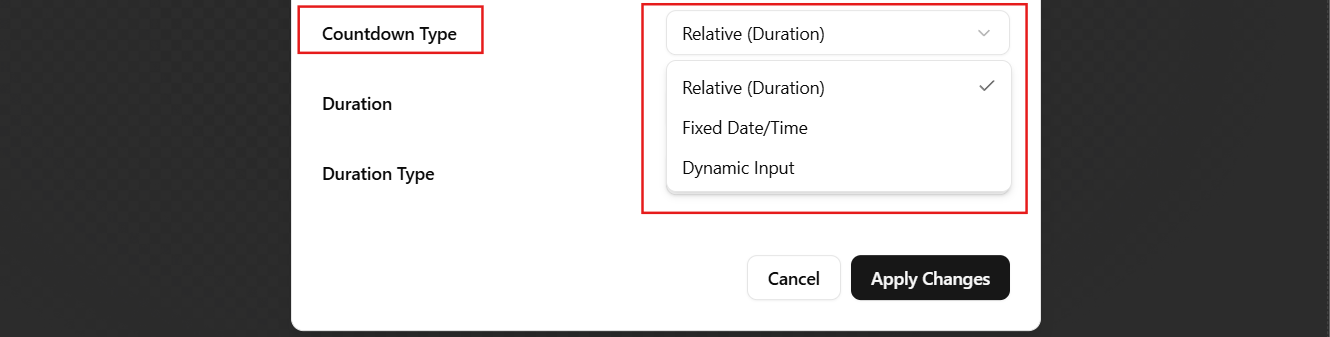
- Duration – Enter the countdown value (e.g., 10).

- Duration Type – Choose the time unit: Seconds, Minutes, Hours, or Days.

Styles Tab
This section focuses on the visual appearance of your countdown.
- Show Days / Hours / Minutes / Seconds – Turn ON or OFF depending on which units you want to display.
- Label Fields – Customize the text for each unit (e.g., rename “minutes” to “mins”).

Buttons
- Cancel – Discards recent changes and keeps the previous configuration.
- Apply Changes – Saves all updates and applies them to your countdown timer.

The Countdown Settings panel allows you to fully control both the look and behavior of your timer. It helps build a sense of urgency and keeps your visitors engaged. Adjust the duration, style, and expiration actions as needed, then click Apply Changes to bring your settings to life.
Learn how to use the Text Element to add clear and compelling messages that complement your countdown and guide visitors toward action: Editor Content – Text