How to Create a Black Friday Discount Code Promo
Follow this step-by-step guide to create your Black Friday Discount Popup in Powerpop.
This tutorial follows the exact sequence of actions inside the Design Editor — from adding rows to adjusting your final layout for mobile.

Step 1: Open the Powerpop Design Editor
- Open your Powerpop Design Editor.
- You will see one row in the Row Section by default.
- Add three (3) more rows below — these will serve as the buttons for the three discounts.

Step 2: Set the Main Popup Size
Go to Main Popup Settings.
Under Size, choose Custom.
- Width: 815
- Height: check Adjust height to content.

You can adjust these dimensions later based on your preference.
Step 3: Add Text and Background Image
- Add the text for the first row.
- Type Black Friday.
- Duplicate the text block and change the second one to SALE.

Before adjusting text, add a background image so you can properly align all elements.
Step 4: Add Background Image
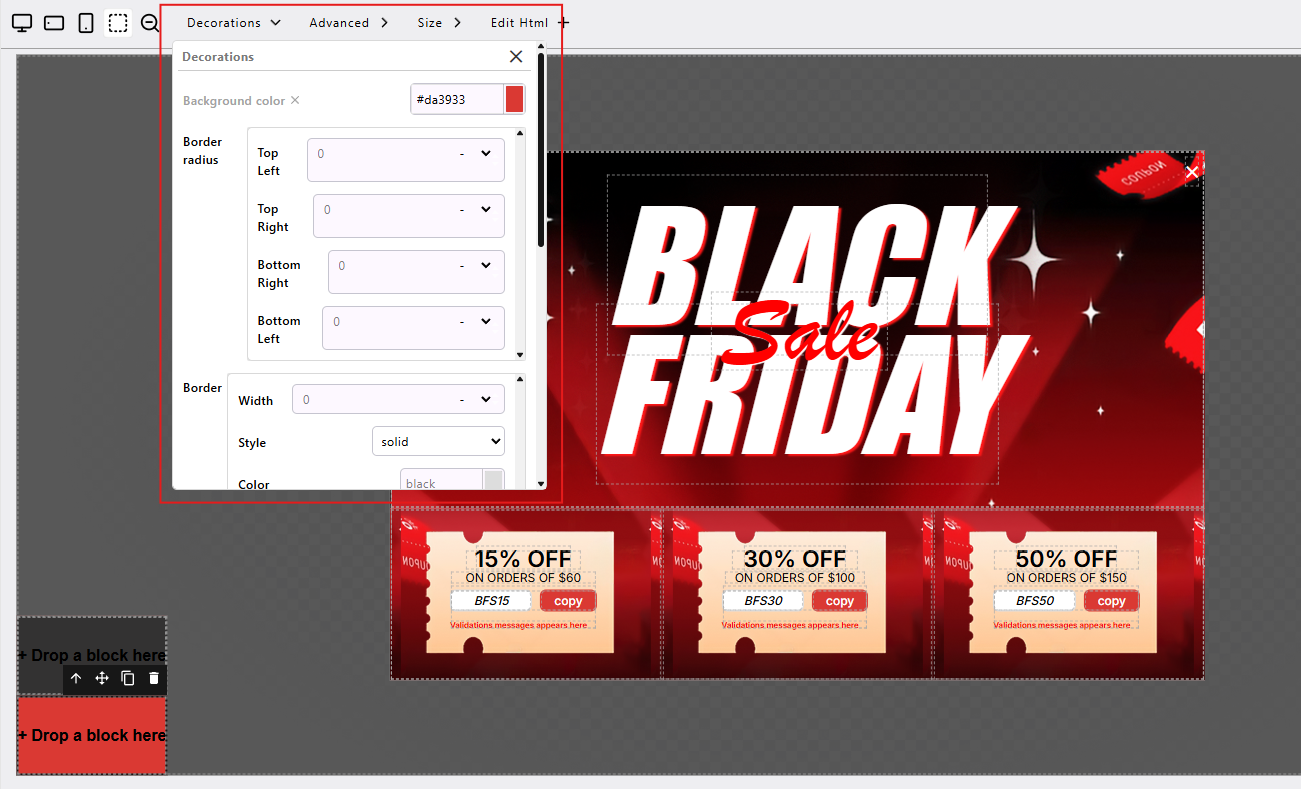
- Click the Row Block.
- Go to Decorations → Backgrounds.

Click the + button and upload your image.
Click + Button

- Click Images, upload the background image, and select Apply Settings.

- Once applied, adjust background properties:
- Repeat: repeat
- Position: center center
- Attachment: fixed
Size: cover
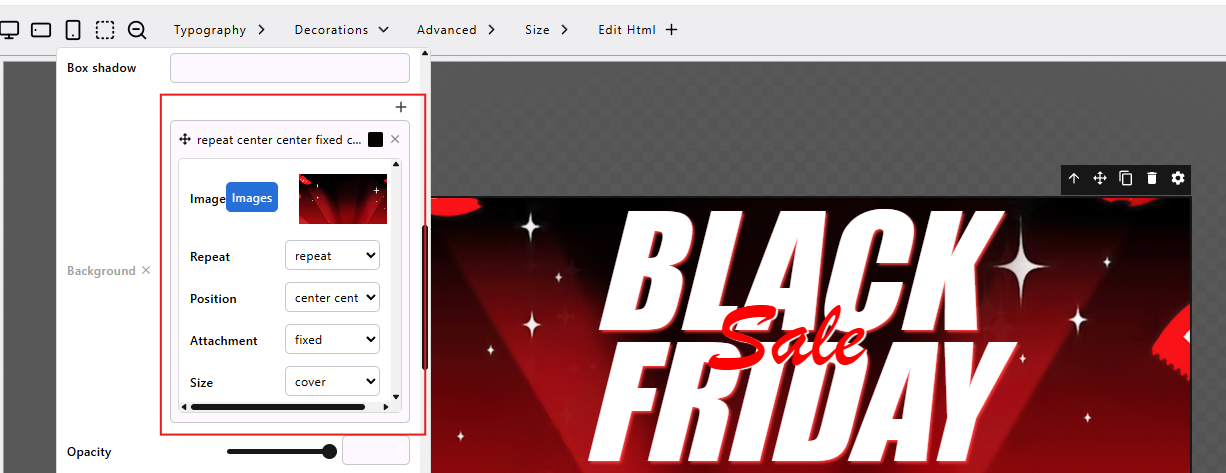
Adjust Background Properties

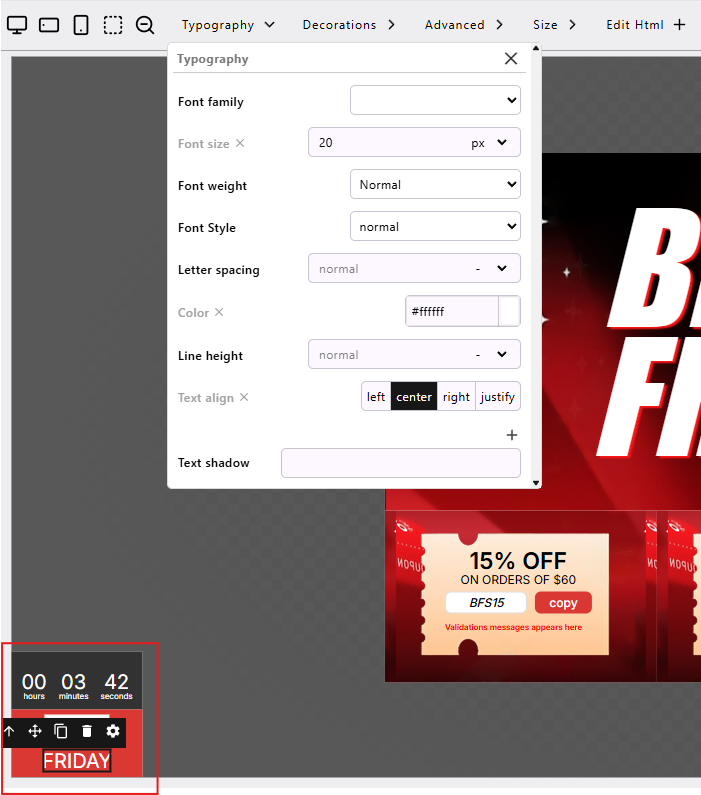
Step 5: Adjust Typography for “Black Friday” Text

Font: Impact
Font Weight: Normal
Font Style: Italic
Color: White
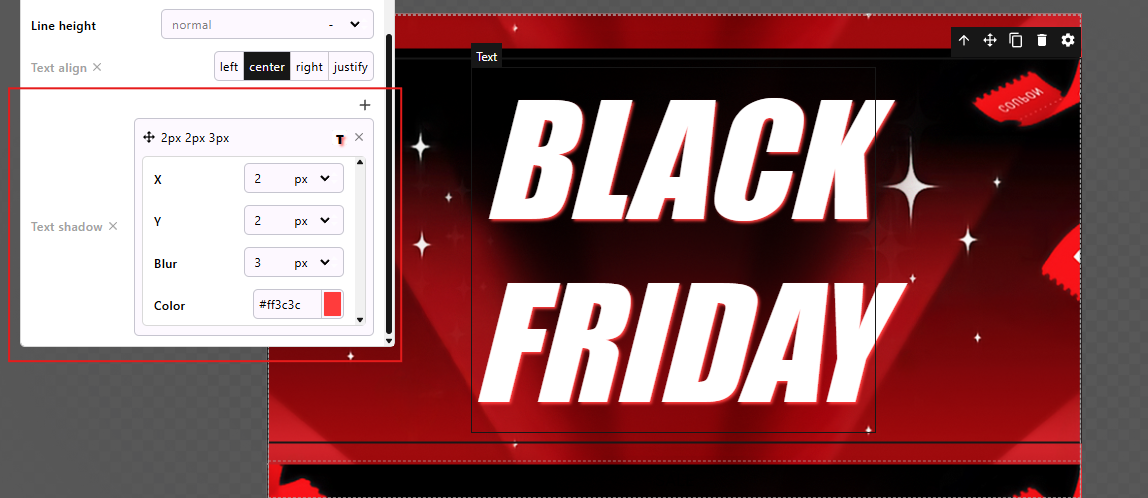
Text Shadow Text Shadow:
- X: 2px
- Y: 2px
- Blur: 3px

Size

- Line Height: 87%
- Line Spacing: 0
- Width: 100%
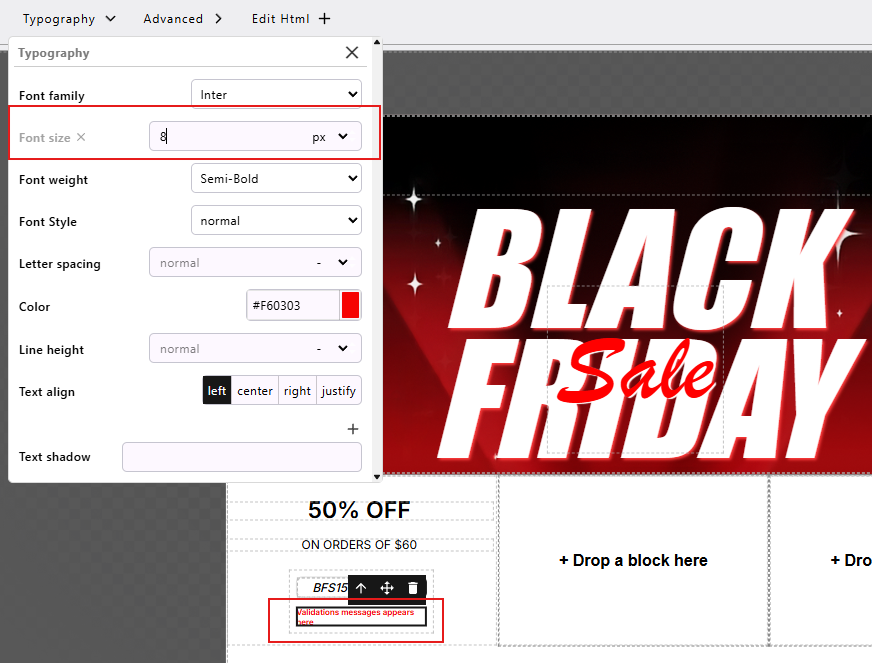
Step 6: Adjust Typography for “SALE” Text

- Font Family: Brush Script MT
- Font Size: 100
- Font Style: Normal
- Color: Red
Text Align: Center
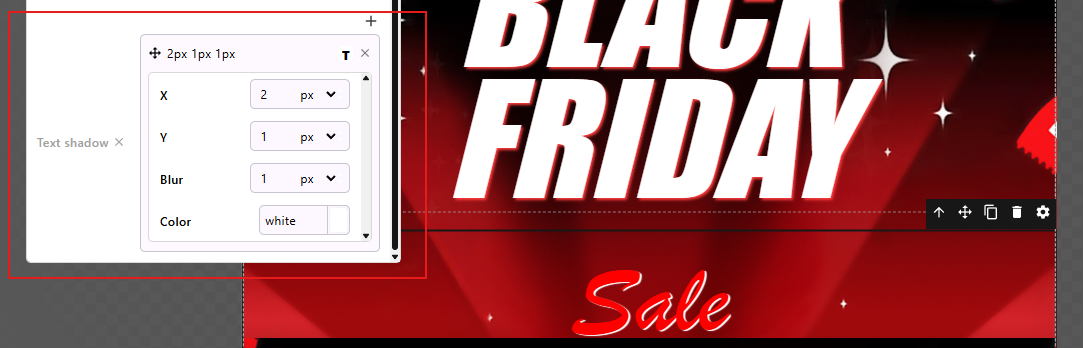
Shadow Settings

Shadow:
- X: 2
- Y: 1
- Blur: 1
- Color: White
Then open Advanced Options to bring the SALE text in front of “Black Friday”.
Advanced Settings:

- Display: flex
- Float: none
- Position: absolute
- Top: 100
- Left: 320
Size Options:

- Line Height: 61
- Width: 22%
Step 7: Create the Discount Coupons
After adjusting the main texts, proceed with the three coupon designs.
1. 15% OFF Text

- Font Family: Inter
- Font Size: 23
- Font Weight: Semi Bold
- Color: Inherit
- Text Align: Center
Advanced → Margins

- Top: 15
- Right: 5
- Bottom: 0
- Left: 0
Padding
- Top, Right, Bottom, Left: 0
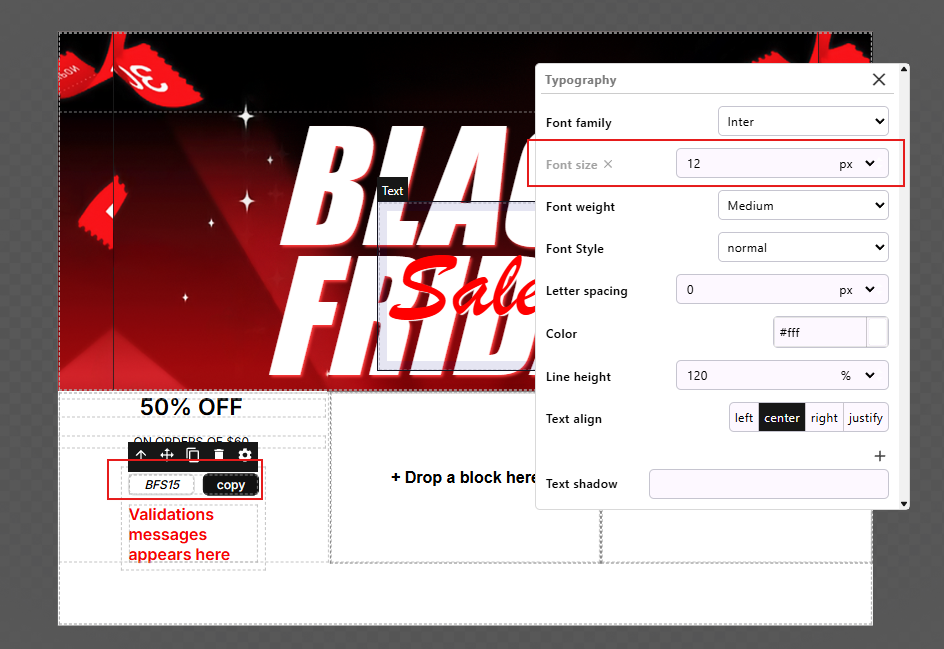
2. “ON ORDERS OF $60” Text

- Font Family: Inter
- Font Size: 12
- Color: Inherit
- Text Align: Center
Margins

- Top: 0
- Right: 5
- Bottom: 0
- Left: 0
Padding
- Top, Right, Bottom, Left: 0
3. Coupon Code Block
Add a Coupon Code Block and click the gear icon.
- Enter your code (e.g., BFS15) and copy it for the button text.

Adjust the Size Options:
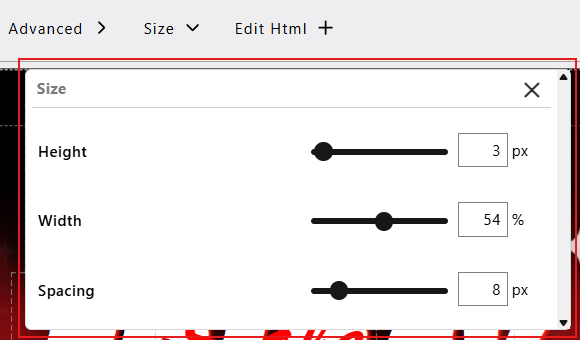
Size Options Copy button font size: 12px
Coupon Button and Font Size Validation image font size: 8px
Validation Image Font Size
Change Background Color to Red.
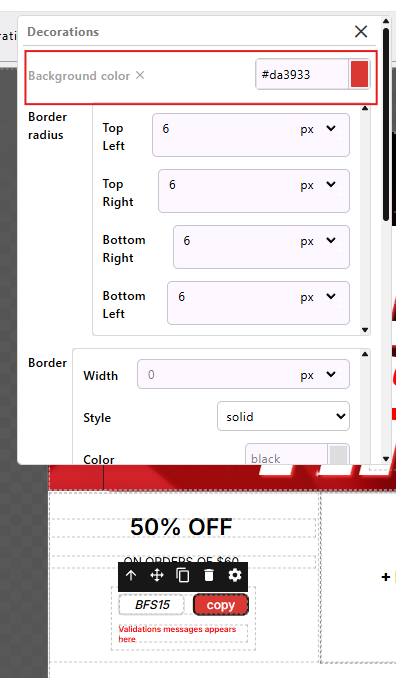
Change Button Color to Red Set all blocks to 0 to compress the layout.
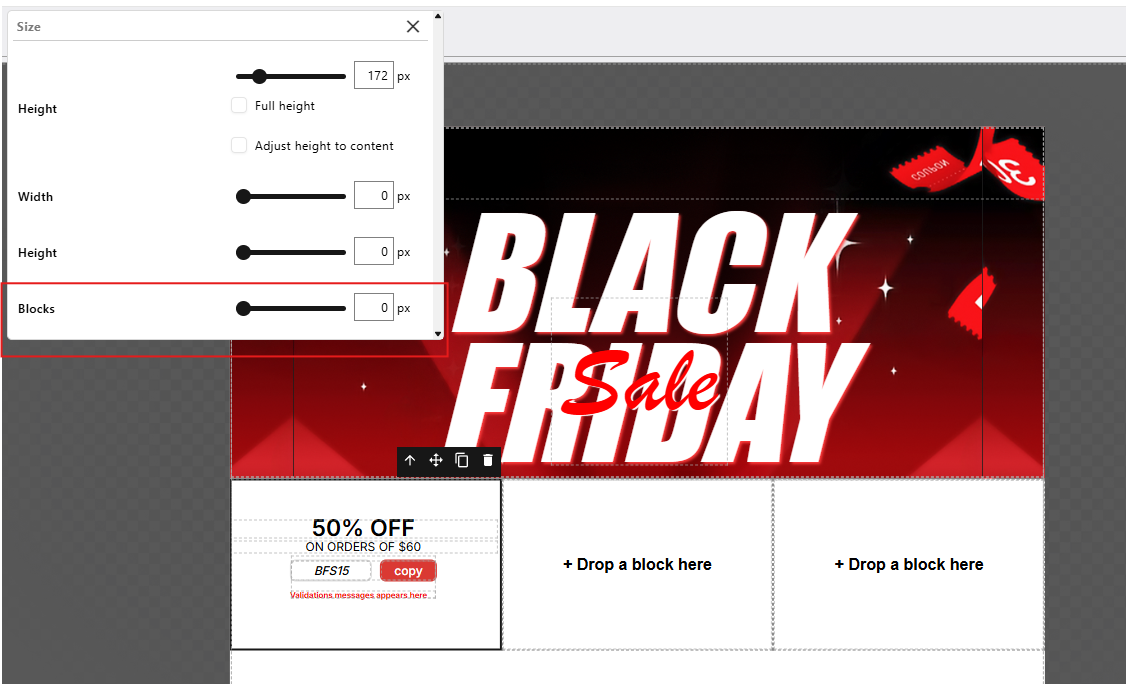
Compress Blocks to 0


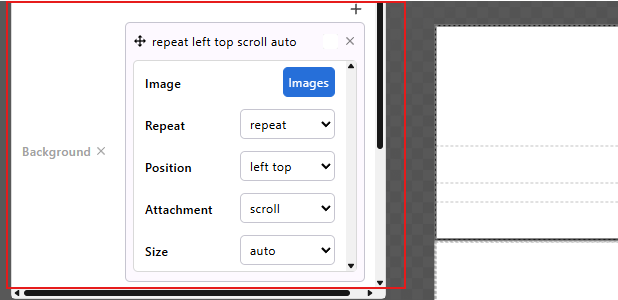
Step 8: Add Background Image to the Coupon Area
Click the block and go to Decorations → Backgrounds.
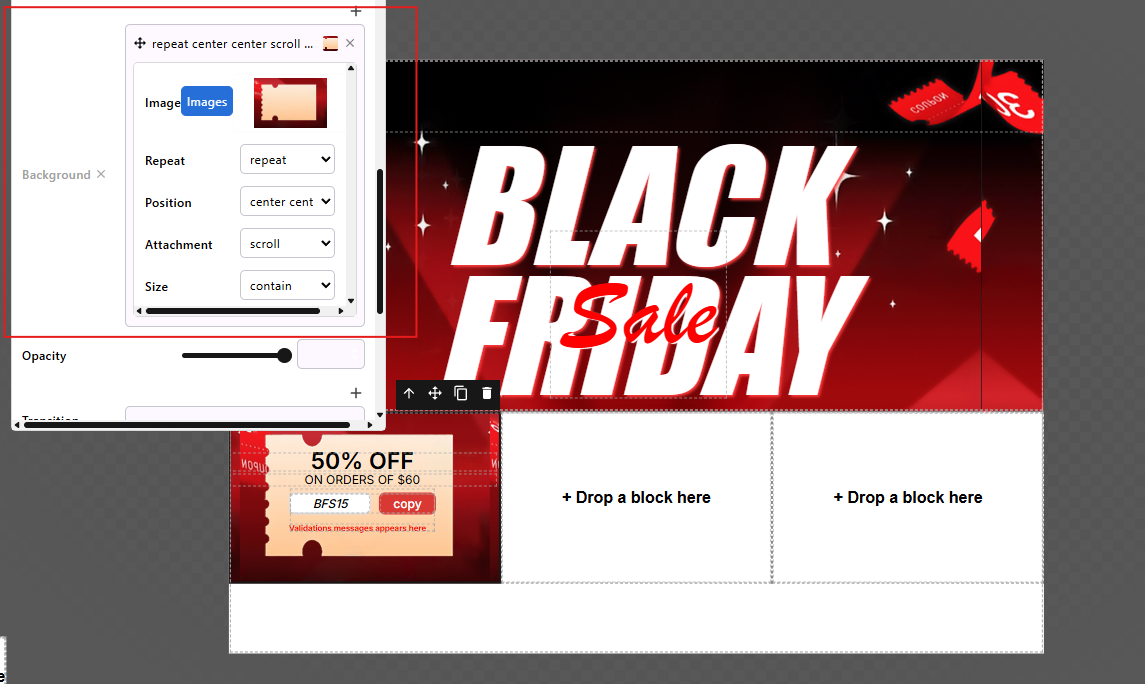
Add and Adjust Background Settings Upload your image.
Set:
- Repeat: repeat
- Position: center center
- Attachment: scroll
- Size: contain

Step 9: Duplicate Coupon Blocks

- Click the first coupon block and select Duplicate twice.
Delete any empty blocks that appear.
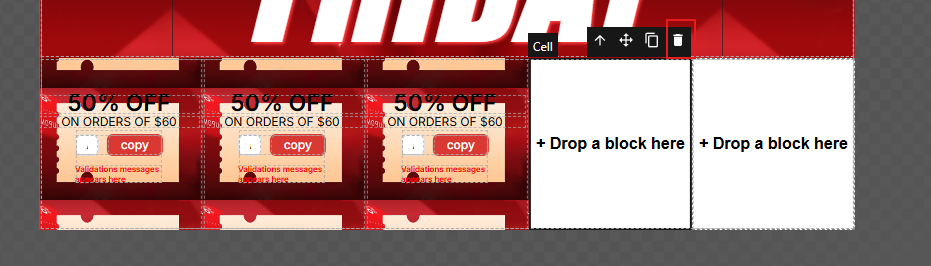
Delete Empty Blocks After deleting, your layout should show three neat coupon rows and adjust the content of each coupon code

Three neat coupon rows


Step 10: Add a Close Button

- Add a Close Button.
- Change the color to white.
Set the Action to Show Step Sticker.

Close Button - Actions

Step 11: Final Adjustments for the Main Popup
- Select the Black Friday block and open Advanced Settings.
Adjust positioning and spacing as needed to align all elements.
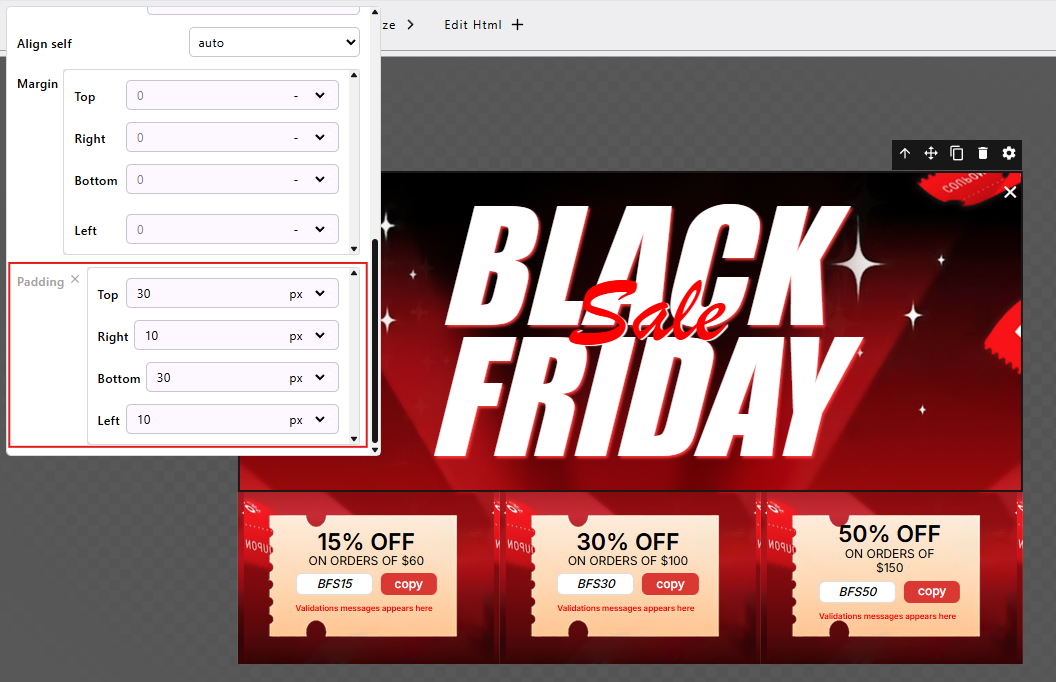
Advanced Settings

Your main popup is now complete!

Step 12: Adjust for Tablet and Mobile
Switch to Tablet and Mobile view.
Tablet and Mobile View - Go through the same settings you configured for desktop.
- Reduce font sizes, spacing, and adjust popup dimensions under Main Popup Settings.

Suggested Width: 194

Step 13: Create the Sticker
- Add another block (total of 2 blocks).
- Top color: Dark Gray
Bottom color: Red
Sticker Background Colors

Add a Counter Block
- Add the Counter Block at the top and set the text color to White.

Adjust Size
- Number: 20
- Unit: 8
Spacing: 12
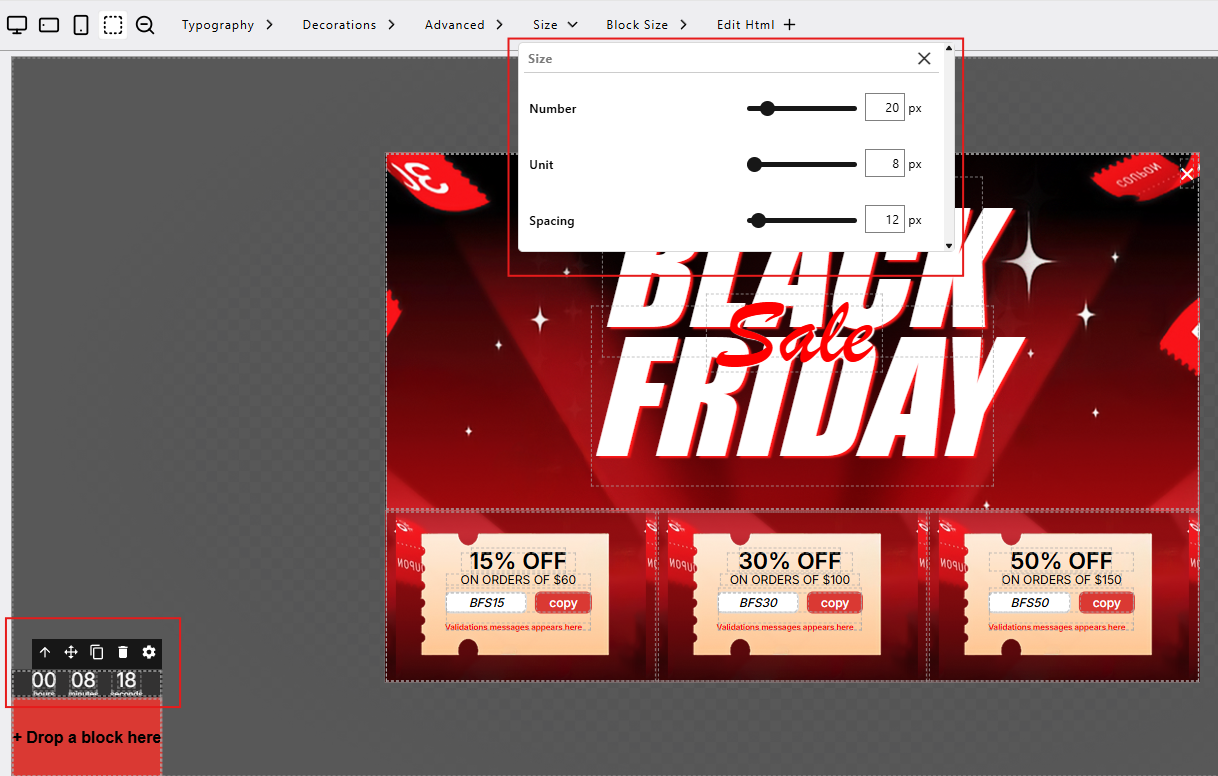
Size Settings

Advanced → Margins
- Top: 20
- Right: 10
- Bottom: 10
Left: 10
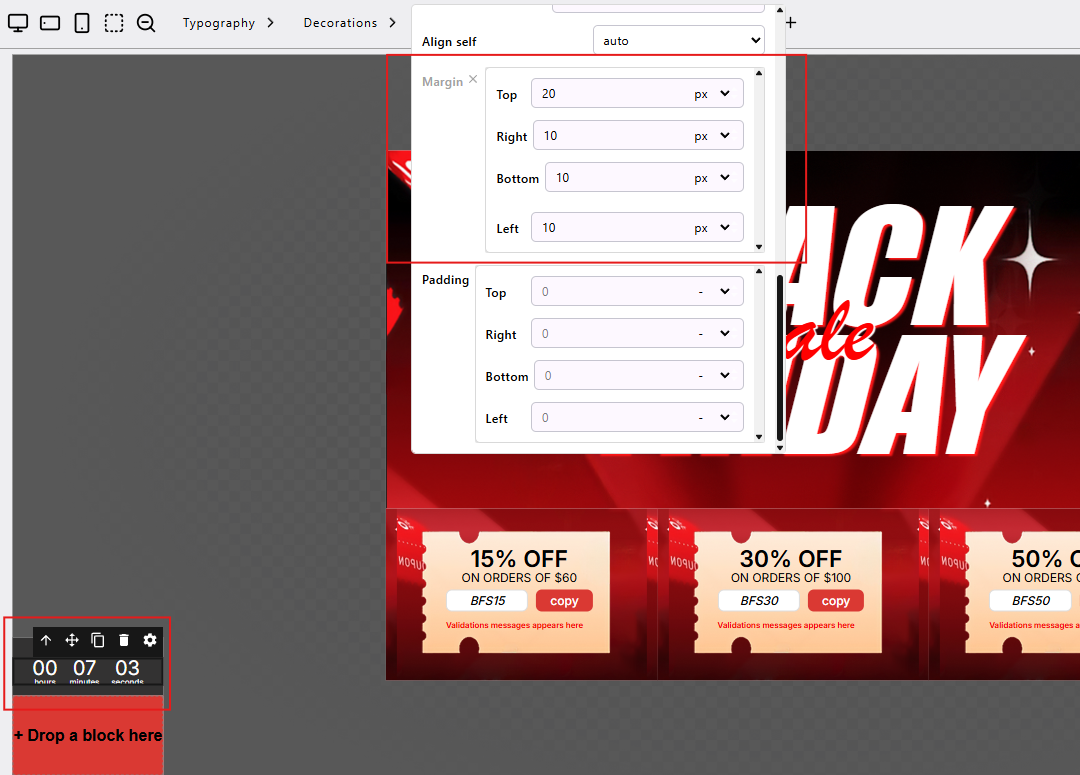
Margins
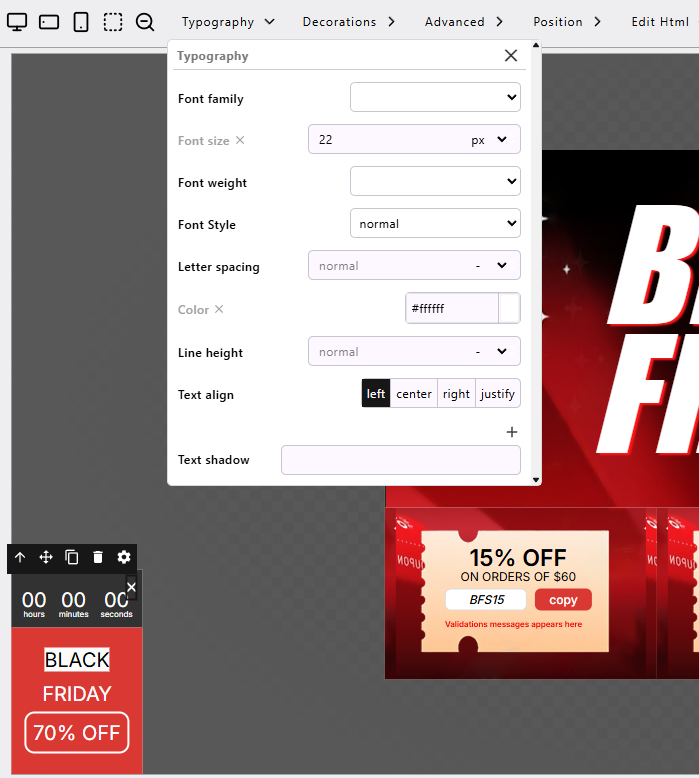
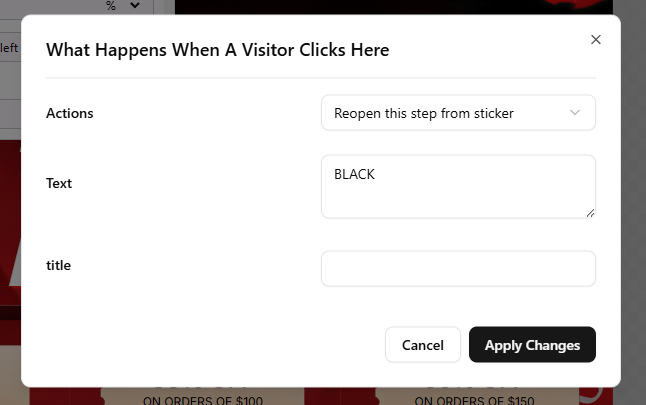
Add the “Black Friday” Text

- Add text BLACK
- Font Size: 20
- Font Color: Black
Background Color: White
Add text FRIDAY
"FRIDAY" text settings - Font Color: White
- No background

- Add text 70% OFF
Add Border

- Border Width: 4
Border Color: White
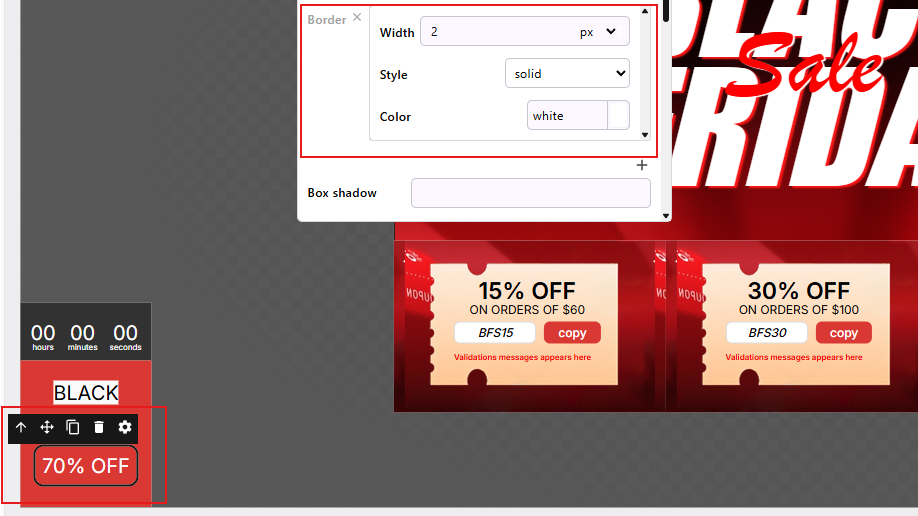
Border Color - Border Style: Solid
- Border Radius: 10

Tip: Adjust padding and margins for proper spacing and balance.
Add a Close Button to the Sticker
Add a Close Button.
Close Button Settings Set:
- Action: End Campaign
- Size: 22
Color: White

Close Button Position - Distance to Top: 1
- Distance to Right: 3


Sticker Border Radius: 20 on top and bottom.


Step 14: Final Customization
Customize the background color of the Main Popup under Main Popup Settings.
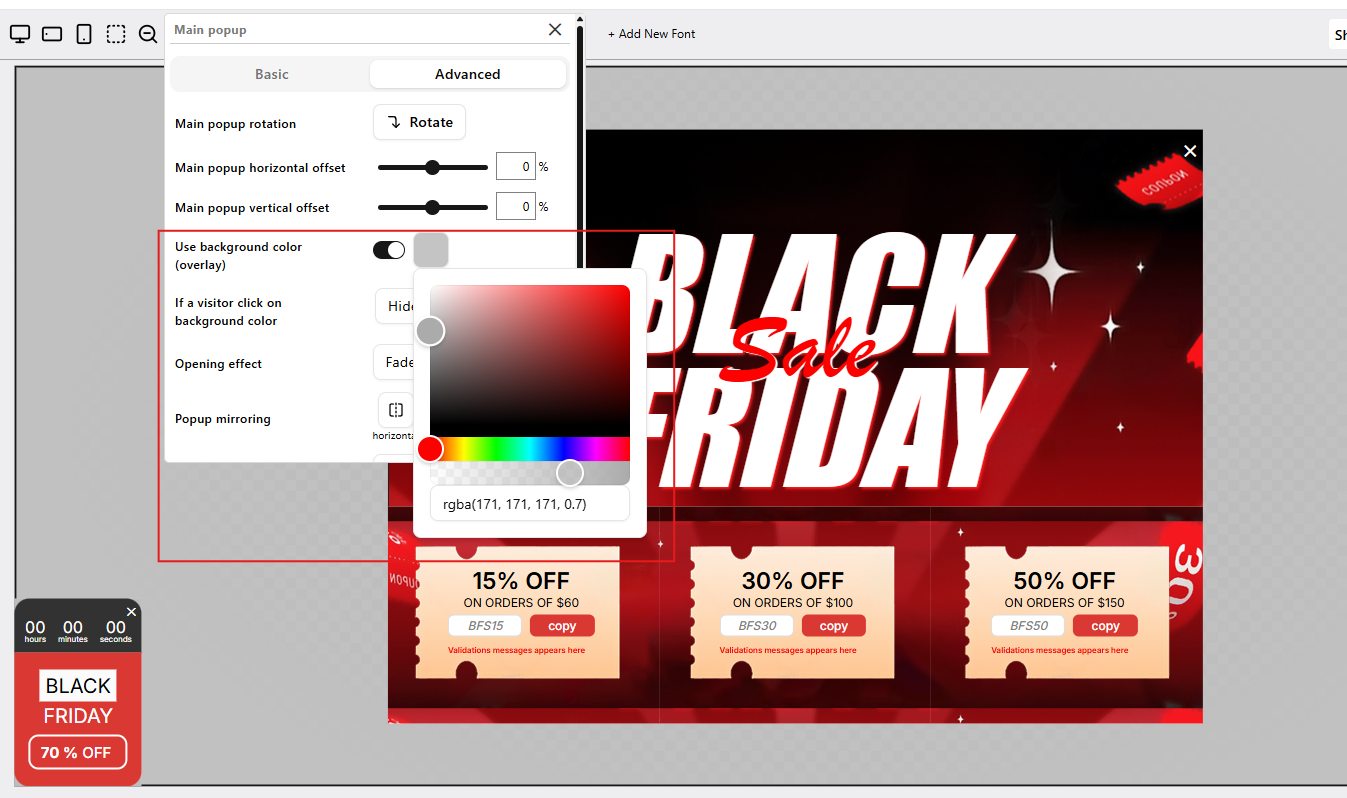
Background Color Set the actions of all sticker elements to Reopen this step from sticker.
Sticker Element - Action - Double-check your design on Desktop, Tablet, and Mobile to ensure everything is well-aligned.


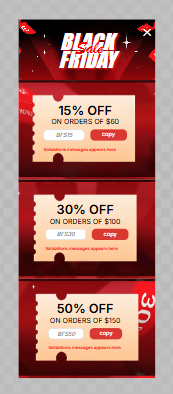
Your Black Friday Discount Popup and Sticker are ready!

You can now preview and publish your campaign.
Want to learn more about building and customizing in PowerPop?